|
| |
| |
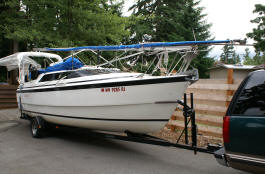
Cockpit
Modifications
- Large Screen GPS/Sounder*new 06*
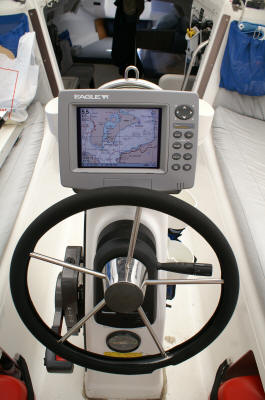
I finally made the move to a replacement
GPS/Sounder unit. Taking advantage of a closeout sale at
Boaters World I purchased a Eagle SeaChamp 2000C DF. This is a
single unit with a 7" 640x480 color screen. It includes a WAAS
GPS, a dual frequency 50kHz/200khz depth/temp transducer, and a
speed through water transducer. It's a perfect fit for the
Mac. It even fits under the pedestal cover I have. The
big bright screen is excellent.
I also purchased the Navionics Gold+ region 913
Vancouver Island chart chip on SD card. This includes Puget
Sound and all the waters inside and outside Vancouver Island.
It also has full tides and currents for the entire area.
The water transducers are mounted on the starboard
transom (I left the old Lowrance GPS depth and GPS transducers in
place).
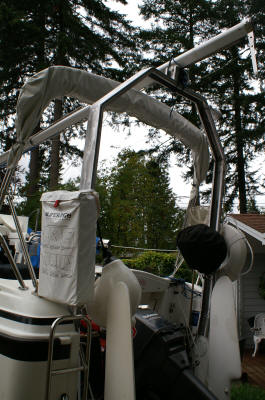
The GPS antenna is on the mast crutch/antenna mount
along with the VHF antenna and a all around steaming/anchor LED
light. It looks like a real antenna mount now. They all
pivot down out of the way so the mast can still be lowered into the
crutch.
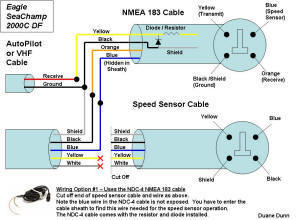
*07 update*
The GPS is now hooked to the autopilot using the wiring schematic
shown at the right. This lets the NMEA connection and the
speed sensor connection share the same port on the back of the GPS.
The new GPS also uses routes/waypoints in a .usr
file format on a second SD card. My favorite PC software
Memory Map can export in this format to the SD card. No longer
do I have to mess with the difficult to use OziExplorer software to
get the routes into the GPS for the autopilot.
The PPC is still onboard as a backup with it's
bluetooth GPS.
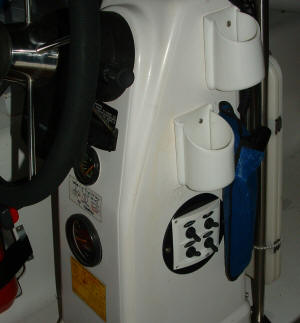
- Pedestal Power Panel *new
04*
With a growing number of
things at the pedestal I added a 4 switch electrical panel to
give me better control over what is sucking power
- Handheld VHF *new
04*
I wanted to be able to
monitor the VHF without having the fixed one blaring down below
in the cabin. I added a inexpensive handheld, The Uniden
Atlantis 250. This has
become the unit we use all the time now. It sits nicely in
the cupholders at the pedestal and has it"s charging base
mounted down below.
- Cockpit Light *new
04*
I picked up a 4 LED fixture
and mounted it to a small hand formed aluminum handle.
It's wired to some curly cord from radio shack. It plugs
in at the pedestal on separately switched circuit and can be
velcroed up to any of the enclosure bows or hand held so you can
get the light anywhere you need in the cockpit.
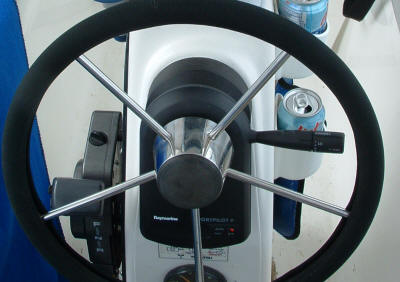
- AutoPilot *new 04*
I installed a Raymarine
Sport Pilot Plus autopilot. This fits perfectly with the
look and size of the mac pedestal. It's easy to install,
you just pull the wheel and slide it on in between. Then
you wire it up and install the compass below deck. I
placed the compass low and in the center of the boat in the
cavity under the aft dinette seat.
It has two modes of operation. In the first you turn the
knob and it kicks in holding the boat on the same course it was
on when you engaged it. It second mode is Nav mode.
This utilized the AP NEMA commands from the GPS to correct the
course. I this mode you can select a mark, waypoint, or
route in the GPS and the pilot will drive the boat right to that
spot. At each turn it asks for permission to turn by
beeping first.
Having an autopilot has made a huge difference in how enjoyable
long passages are. No longer are you steering for hours on
end. I can actually sit back and enjoy the view, check out
things with the binoculars, and pay more attention to the charts
than ever before. It also is a great third hand when you
just need to go take care of something for a moment.
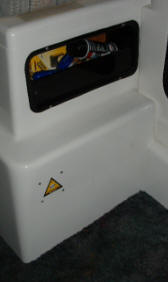
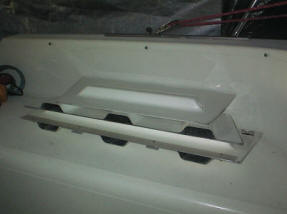
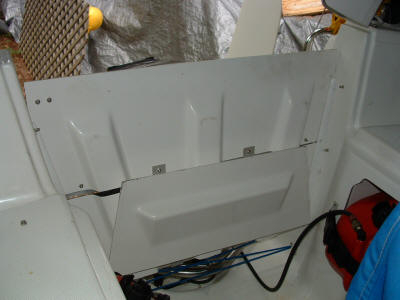
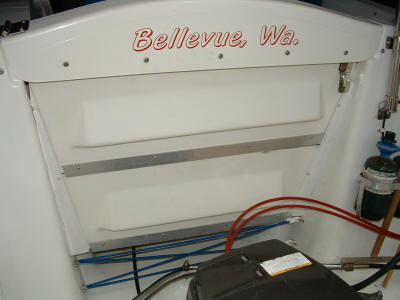
- Cut Hatch Boards
We quickly found we didn't like the big one piece
hatch board so I cut the panel into 3 equal pieces. I
added aluminum strips which keep out any water at the joints and
blend in perfectly with the side aluminum panels
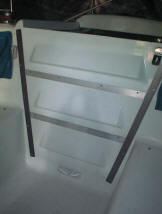
- Rear Hatch Board Storage
*new 04*
We wanted a better place to
store the hatch boards. With our full enclosure we found
we were using them less and less yet I still wanted to have them
on board for securing the boat at docks. I added two
beveled pieces of wood with a slot in them at the back of the
cockpit under the seat back. This lets the two upper hatch
board panels slide in to a secure storage area. The
smallest third panel is velcroed to the bottom one keeping them
all secure, out of the way, yet easy to get to when needed.
It also adds a solid wall at the end of the cockpit so nothing
goes overboard.
- Elastic Nets
To keep things on board
in the back of the cockpit we originally added elastic
shockcords across the back. When I added the mounts that
let the hatchboards be stored at the rear I shortened up the
shockcord, but still left some as they do a good job of keeping
things in the boat when neither of the full rear panels are
installed.
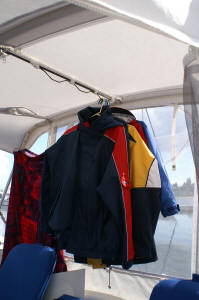
- Hanging Storage *new
04*
On the bottom of the bimini
spreader bar I attached a rod that I bent a zig zag pattern
into. It is held in place with 4 pipe clamps. This
gives a high hanging area out of the way at the back of the
cockpit for wet gear when returning from a rainy hike. The
gear can be hung on standard plastic hangers.
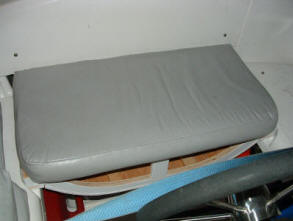
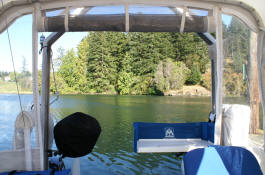
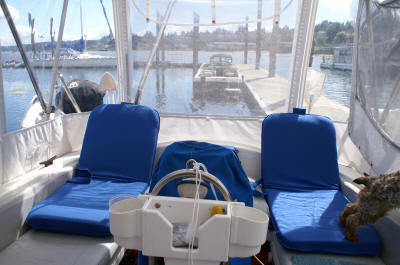
- Raised Seat
*new 03*
Originally I cut off the
factory seat portion of the hinged seat and back. This was
to gain better access and in anticipation of having to stand in
the lower well when steering under a low bimini. At first
I made simple replacement seat out of a 2x10. Around the
time we got our enclosure with a high bimini they also came out
with the 'M" model of the mac which had a raised helm seat.
Wanting the best of both worlds, I designed and built a
reversible helm seat. You can set it aside when you want
an open area behind the pedestal. Placed flat side up it
gives you a continuous cockpit seating area like the original
seat. Place hump up it gives you that extra boost you need
to see over the bow when under power. It also is hollow
inside and gives me a place to store stuff like the cockpit
light, the shore power cord, the rear canvas panel, the pedestal
cover, etc. The stock seat cushion can be attached to
either side.
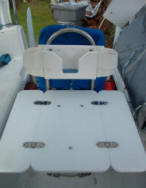
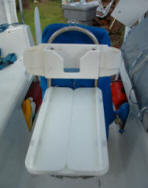
- Cockpit table
*new 03*
The cockpit table we have is
also from Dowsar Marine in Ontario Canada. It flips up to
be a narrow table for snacks and has panels that fold out and
make it a wide table for dining. I created a custom
binocular box / cup holder unit for it from standard parts.
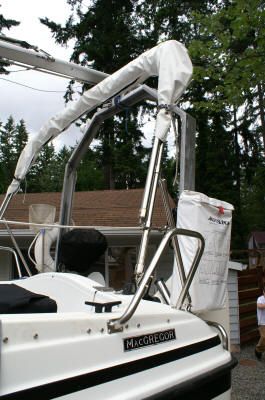
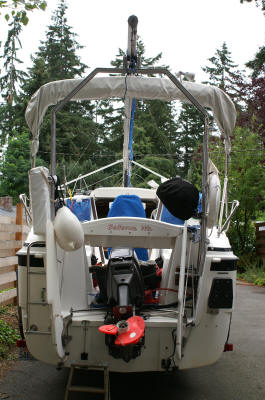
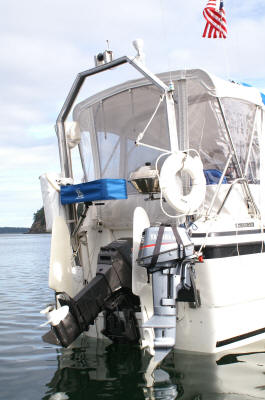
- Transom Arch
*new
07*
Using a used
piece of surplus 4"x1"x20' aluminum channel I fabricated a new
transom arch. Not only did it need the four upper bends, but it
needed just a slight bend in at the bottom on each side to match
the transom angle perfectly. Once I had it cut, bent, and braced
my neighbor welded it up. I then ground down and polished all
the welds and exterior. The whole structure is very light
weight, much less that stainless tube arch would be. It has a
used look as the channel had some pitting and grooves that could
not be removed but it has turned out to be very functional if
not perfect cosmeticaly. All in all hard to beat for free.
I already had an access panel on the starboard side that I cut
in to install my dinghy motor bracket. I added a matching access
panel on the port side. The channel is bolted to the transom
with three 3/8 bolts per side and has a full aluminum backing
plate on the inside of the transom behind the bolts. The plates
are cut from the same channel. I mounted it at a slightly raked
back angle to match up well with the angle of the aft panel in
my enclosure.
The number one purpose of the arch was to serve as a rear mast
carrier that would support the mast in the trailering position
above my folded back bimini in it's boot. I didn't want to mess
with folding the bimini down for mast lowering and trailering.
The old mast crutch was poorly designed and it bound up on the
mast when rolling it forward and backward. The old one also
sagged and required an extra pipe to support it securely and
limit the bouncing. I used the same rubber roller that was in
the old factory crutch. The new arch is super strong and allows
the mast to roll smoothly back and forth.
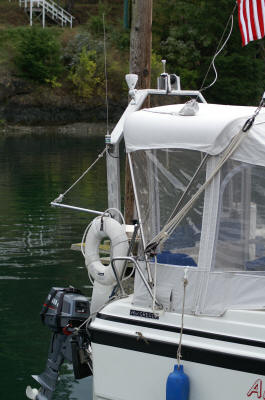
It also provides great mounting locations for a bunch of stuff.
I moved the lifesling and the life ring to it's outside
surfaces. I used the stock ring bracket and attached a cross
wise piece of 3/4 tube to strap the lifesling velcro to. This
gets them both more inboard than where they were on the aft
pulpits so they don't hang out past the boat width and hit
things. It also let's me leave them in place during trailering.
The arch now also mounts the VHF antenna, the GPS antenna and
the LED anchor light. All these are mounted so they fold down to
allow the mast to roll above them.
On the inside of the arch the BBQ grill and the bracket to hold
our rod holder mount BBQ table are attached. This puts the BBQ
area in a great place to use out the back window of our
enclosure. You no longer have to step out onto the transom to
grill.
The same stainless rod holder that holds the table also mounts
our 400' poly shore tie spool. I just pull the table and drop in
the poly spool mounted on it's 1-1/2" dowel. With both the table
and the spool removed the rod holder makes a nice handle when
boarding from the stern. The rod holder itself can be pulled
right out of the bracket to clear the way for loading gear.
Off the back of the arch I installed a mini gin pole. It is a
simple 3/4" aluminum tube that slips over a protruding 3" bolt.
The outer end has eye straps for the top and the bottom that are
through bolted. By attaching the main sheet to the bottom of
this I can easily lift the dinghy motor off it's bracket and
lower it onto the dinghy transom. The gin pole slides off easily
and is stored inside the arch channel. The line does not need to
be untied.
In the future, more uses of the arch may include solar panels,
TV antenna, Radar antenna, and Kayak carrier (when the sailing
mast is left home).
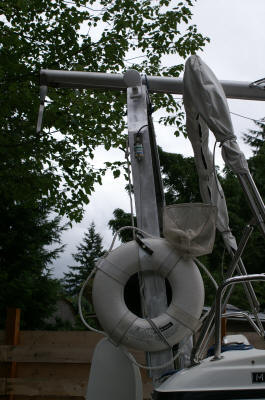
- Lifesling / Life Ring
These are now
mounted on the arch.
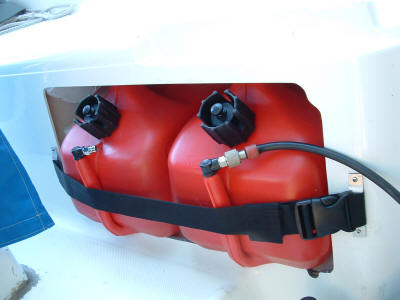
- Four 6 Gallon Fuel Tanks
*new 04*
Originally we had two 6.5
tanks. This wasn't enough and made us have to plan around
gas stops to much. I added extra 2 gallons but we were
still didn't have enough and pouring from the 2 gallon tank to
the 6 gallons resulted in a few spills.
I had always liked the inexpensive Tempo Value 6 tanks, but they
were a bit long to fit side by side in the locker. After
considering about every other more expensive tank, I decided to
modify the locker to make the Value 6 tanks fit. I cut down
the front lip and small section along the aft vertical edge
using a spiral saw. A sanding drum on the dremel trimmed
everything up nicely and I also lowered the drain area so the
lockers will no longer hold water. The 4 tanks then fit in
perfectly. Using a couple bars and some spare straps I
crated a retaining strap that goes across the front of the tanks
to keep them in place when heeling.
This system turned out to work great. Now I have 24
gallons of fuel. All the filler caps are easy to get to
without removing the tanks. The fuel line connections are
right on the end of the tank rather than the top so it is easy
to switch the line from one tank to another. Yet, if
necessary, the tanks can be removed and take to shore for gas in
a dinghy or put in the truck to fill up with cheaper landside
fuel.
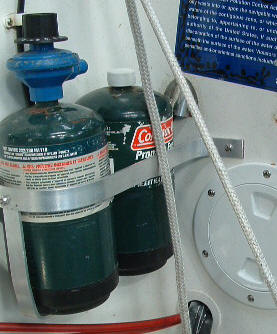
- Propane Storage Rack *new
04*
When I did the gas tank mod
I no longer could keep fenders and propane in the fuel lockers
along with the new tanks. Using some bent aluminum bar I
made a storage rack on the starboard transom that holds two
propane cylinders, one with the grill regulator attached.
This keeps the fuel handy to get when starting the BBQ yet out
of the way in a safe storage position should any leaks occur.
- Fender Storage *new
04*
We added some cheap mesh
bags on the mid pulpits to store fenders. They are simply
cable tied on and each will hold two G4 fenders. This has
worked very well. It keeps the fenders handy yet out of
the way. This winter we will sew up two custom made
sunbrella bags to replace this with more storage space that
looks better.
- Cockpit Lounge Chairs
*new
07*
A pair of 'Go
Anywhere Seats" fits just perfect at the aft end of each
cockpit seats. Sitting and napping in the cockpit is now
very comfortable.
|

 |
|