|
| |
| |
Interior Modifications
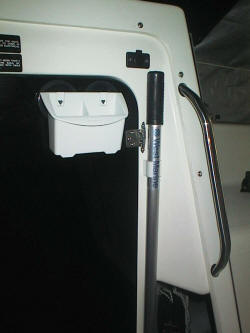
- Boat Hook
We found a handy place for the boat hook stored
vertical just behind the hinges for the head door.
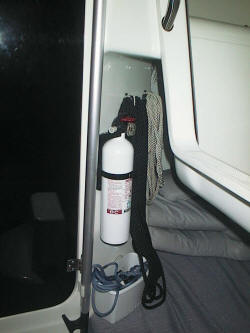
- Fire Ext / Dock Lines
Along the aft angled portion of the head we have
hooks to organize all the dock lines and have mounted a fire
extinguisher.
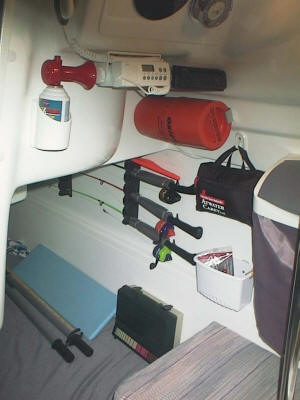
- Radios, Signal Kit, First Aid Kit, Fishing Rods
The aft wall behind the galley is where our radios,
emergency stuff and various other things are stored. We have
added even more hooks than shown in the picture for the gameboy
cases.
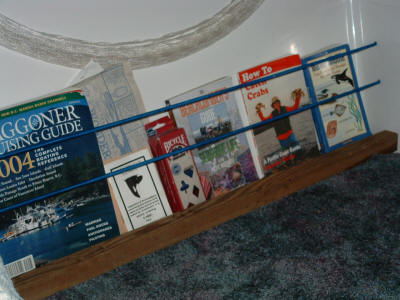
- Book Storage
I built book storage rack at the outboard end of each
dinette seat. The aft one is where we store all our charts,
logbook, and other navigation related things.
- Under Table Book Area *new
04*
We added more storage for books
by putting in a board that spans the width of the table foot well
along the floor and added a couple shock cords above to keep
everything in place.
- Shoe Net
We have a net for shoes under the
table.
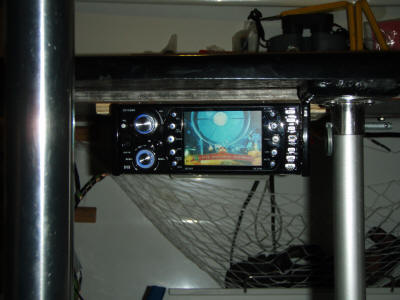
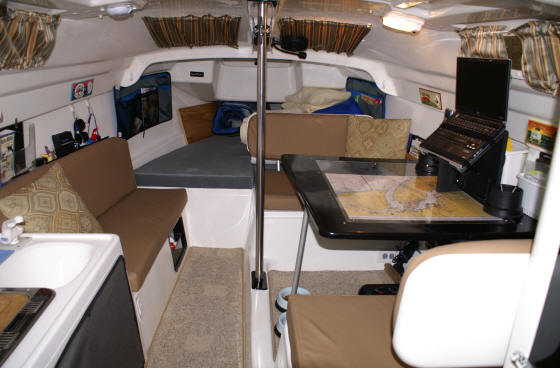
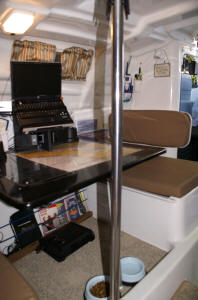
- Built in Entertainment Center
After years of using a computer
as the entertainment center mounted in various ways we decided to
put in a built in system. Doing this gained back some needed
table space, and also brought back a way to power both speakers in
the cabin and in the cockpit.
It consists of a surplus 20" computer monitor I picked up cheap that
in addition to VGA and DVI inputs also has composite and s-video
inputs. I disassembled the table top mount and adapted it to
wall mounting. This mount is in the center at the back and I
added two wedges of foam that eliminate all vibration of the screen.
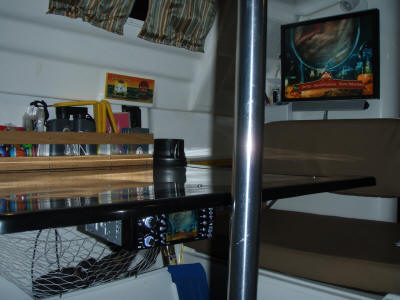
It requires 120v power so I routed an extended power cable under the
table to the point on the forward dinette seat base where I have a
shore power outlet and a outlet from my 125w inverter.
I then bought a low priced AM/FM/CD/DVD player at Frys to drive the
screen. I mounted this radio to a plywood block under the
table just forward of the support leg. This keeps it out of
the knee space, yet easy to access. 12v power wiring runs
under the table to the starboard wall then forward and around to the
port side in the storage compartments until it makes it's way aft of
the galley to the power panel. Three speaker cables also
follow this path, one for the right side cabin speakers and two for
the cockpit speakers which had been disconnected. The forth
left side cabin speaker is simply mounted under the table as well.
The installation turned out very well and we can now all comfortably
watch movies on the large screen. We also have an AM/FM/CD
payer back with sound in the cockpit and the radio has a input for
our iPods or the XM radio.
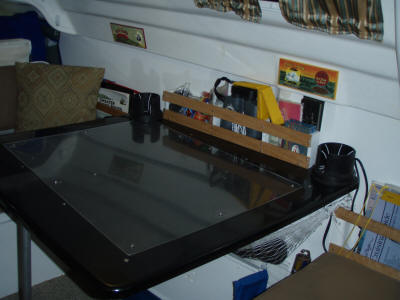
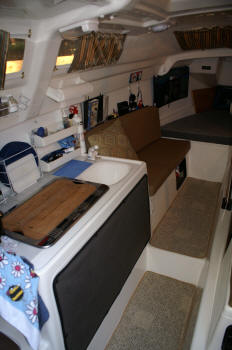
- On Table Storage Rack
With the removal of the on table
entertainment system it was time to install a more permanent storage
solution on the table. I built a custom starboard base and
added vertical dividers. Across these two strips of oak finish
up the rack and make it match the two book racks already on each
side of the table.
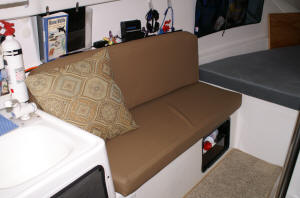
- Settee Shelf
*new 03*
On the shallow ledge along the
settee I added a front plexi lip and a variety of other small
storage devices to make good use of this area for everything from cookbooks to
the misc cables and chargers that needed a home.
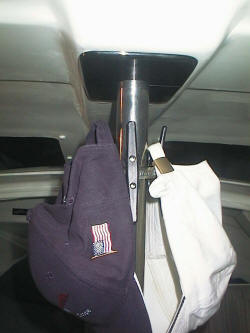
- Hanging Hooks
For some hanging storage I bought a bunch of cheap
plastic cleats and attached them around the mast post and the galley
post using a simple stainless pipe clamp.
- New Companionway Stairs
I was offered a free stainless
stair ladder from an early M which I adapted replace the awkward
fiberglass step at the companionway entrance. I cut down the
ladder to be just 2 steps and fabricated a set of brackets that
mount it at the companionway. They extend far enough out to
let the ladder swing completely vertical to give full aft berth
access. It also lets the head door open all the way. The
ladder stops short of the floor resting against the old lower step.
This was necessary to allow it to clear the dinette seat when
swinging up.
This new stairway now gives nice wide access and has evenly spaced
steps unlike the original steps.
The ladder had no treads so I made a simple set of wood ones stained
black with some non-skid added for good footing.
I cut down the old upper step that covered the ballast tank vent and
center fill. It allows just enough space inside for the
ballast controls yet is still quite flush. I made a longer
port side bracket so all the same mounting points could be used.
- New Cushion Foam
*new 03*
We replaced all the factory seat
foam and the vee berth foam with a much denser and firmer 3" foam.
The new foam is installed in the same factory covers.
- New Cushion Covers
*new 07*
We replaced all the factory
cushion covers with new faux leather covers from
www.boatbimini.com .
The covers fit the existing foam like a glove and look great.
The color is "Teak". It has completely changed the look of the
interior.
- New Carpet
*new 07*
We replaced all the factory
carpets with edged Berber carpet from
www.boatbimini.com .
It fit's great and goes perfectly with the "Teak" replacement
cushion covers. It is also great to have carpet with trimmed
edges that will not fray over time like the factory carpet did.
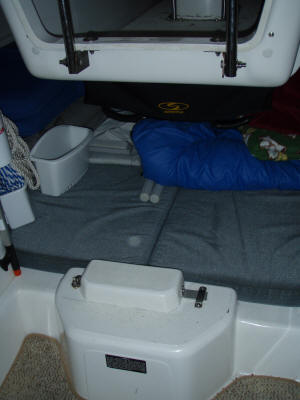
Vee Berth Extension, Port Side
*new 05*
A simple 24x12x3/4" board now
extends the port side to the same length as the starboard side with
the seat back removed. The cushion from the seat back fills
the space. The board sets on top of the port settee cushion
and goes under the forward dinette seat cushion. Friction
holds it in place.
- Memory Foam Vee berth topper *revised 07*
While the stiff new foam is
good, we wanted a softer surface in the vee berth. A queen
sized memory foam topper trimmed for the vee at the foot does the
trick. It stores folded to starboard and covers all the
cushion gaps for sleeping.
We now added a 1" convoluted foam in the same cover under the memory
foam. This has finally hit the right comfort level.
- Relocated Galley Bins
When I cut the bins out of the galley shelf I
separated them and I built them into some areas of the under seat
storage that were difficult to access.
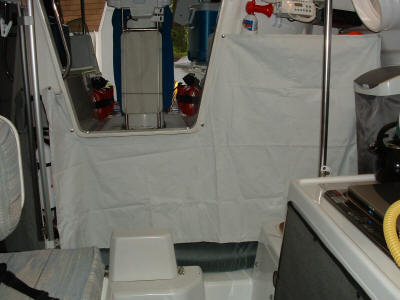
- Privacy Panels *new 04*
- Privacy Panels, relocated
*new 05*
Last year we made a panel for
some privacy when we were sleeping in the vee berth. When we
moved to the dinette we re configured the vee berth panel to mount
further forward and made an addition panel for the aft berth.
This with bags down the center of the aft berth has created three
private staterooms for the kids while se sleep in the salon. While
very simple to make, just that slim thickness of the fabric has made
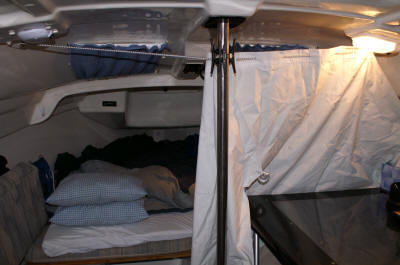
the boat a great place for the 5 of us to sleep.
*Update 05* We decided to move back to
the vee berth. Because of this, I relocated the loops that
mount the forward privacy panel back to the forward edge of where
the lights are mounted. This moves the panel back to just
forward of the center post which gives us a nice spacious forward
cabin. The panel blocks the view down to the seat cushion
level in this new location.
- New Curtains
*new 07*
Once we replaced the cushion
covers and the carpet we needed to replace the blue curtains and
pillows to complete the new look. This time we took more time
sewing the curtains in a way that is much more finished and
completely hides the cafe rods and brackets.
- Stiffened Table *new
04*
When we lowered the table for
the first time this year we were dismayed by how much it flexed
(maybe a diet is ahead). I bought 2 pieces of steel square
tube and bolted it to the bottom of the table running front to back
to stiffen it up. This has solved the problem.
- Canvas Storage
*new 03*
When we purchased our full
enclosure it became clear that we needed a place to store all the
panels that was up out of the way. I bought a $2 black plastic
roll up sled at the sporting goods store. Along it's two long
edges I put strips of velcro. I then put matching velcro along
the upper notch in the aft berth on the port side. Then I
rolled the sled into a 'j' shape lengthwise and stuck the velcro
together. This made a removable shelf up out of the wan on
which we can rollup and store all the canvas panels of the full
enclosure.
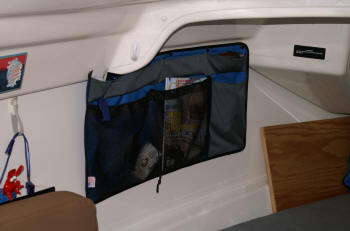
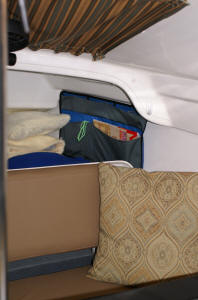
- Storage Organizers
*new 07*
We added some storage
organizers in the vee berth and head. They are a set intended
for use at the galley from www.boatbimini.com , but they worked well in the vee berth area.
They are very well made and install with a series of snaps along the
top edge and velcro at the bottom. The snaps are very secure,
but they do require drilling to install the snap bases.
The third is in the head forward
of the sink.
|


 |
|