|
| |
| |
Old
Modifications
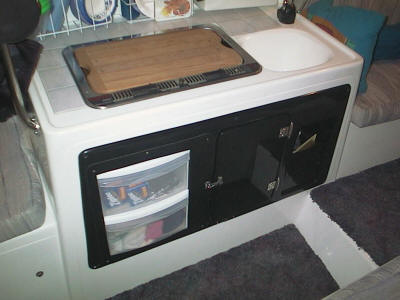
- Drawers in Face *old*
Originally we wanted more
storage in the galley area so I cut out the molded bins and put in
two drawers. This has since been replaced by the mod below.
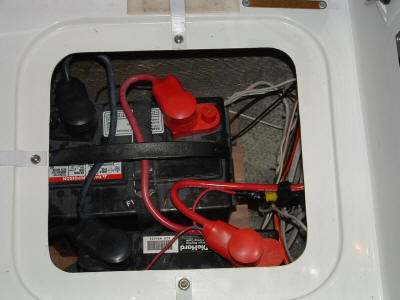
- Dual Batteries*old*
The boat came with a single Group 24 dual purpose
battery that is rated at 65 Amp hours. Wanting more capacity I
added a second identical battery giving me a total of 130 Amp hours.
I built a plywood base that slides under the original battery and
supports the new battery. The battery is attached with tie
down straps and all the terminals are completely covered to
eliminate any chance of arcing. The plywood also gives a place
to mount the meter shunt and the negative buss bar.
To keep
the system very simple I just connected the two batteries together
in parallel creating a single large bank. This in conjunction
with my very accurate Link 10 amp hour meter has proved to be plenty
of power even as our appetite for electricity has grown as we add
devices.
I do carry a separate small jump starter battery as
a back up but I have never come close to needing it.
- Power Meter / Switch Panel *old*
I originally installed a 4
circuit panel on the aft side of the galley with my Link 10 power
meter above it.
- Portable Table Storage
*old*
- Entertainment Center
*old*
One of our best and most
versatile mods yet. For a few years we have had our First mate
BBQ table and it has worked will on the back of the boat for BBQing.
But when it was not there it has just been stored loose under the
dinette table. I wanted to both make better use of it and get
it out of the way. It has a fishing rod mount on it's bottom
and by adding some fishing rod mounts inside the cabin we were able
to gain a whole lot of versatility.
The first location I set up to mount it is on the back of the
forward dinette seat. Mounted here it is out of the way, adds
extra shelf space, and you can still sit at the seat. In
mounting the rod holder I added a 2x4 spacer to offset the rod
holder more to the front.
The second place I mounted a rod holder is on the forward face of
the galley. This lets the table mount above the settee seat
ahead of the galley. This adds a whole lot of extra space to
the galley. It is a great place for the dish drying rack when
doing dishes. Its a great sidebar to the table when eating.
AND, it also makes a great entertainment center. I cut a
couple slots in the table and put in some velcro straps that hold
the laptop in place on the table. This turns out to be a
perfect place for all of us to sit around the table and watch
movies.
We have a FM modulator that plugs into the computer and sends the
audio to the stereo for that theater sound.
*Update 05* Mostly the table
stays aft for the BBQ but can still be moved to the galley extension
position. We no longer use it for the entertainment center.
- Entertainment Center v2
*new 05*
In an effort to simplify some,
and now that we are back sleeping in the vee berth, I decided it
made more sense to have the entertainment center on the starboard
side at the table since we no longer need to clear it off and lower
it every night (see below). I built a custom rotating desk
unit to mount the computer to. It has a tee shaped base with a
sloped surface. This is securely attached to the table with a
bolt that allow it to rotate. It raises up the computer screen
nicely and makes it easy to view for all. Velcro straps secure the
computer. Just under the desk portion I mounted two
Labtec powered computer speakers horizontally. I paid special
attention to find a set that runs on 12v. This lets them be
wired directly into the boat power. They also have a
sub-woofer which is mounted down below the table. This gives
us a versatile entertainment center, the speakers can plug directly
into the computer for movies or into one of our MP3 players for
music. The power draw of the speakers is far less than our
Sony radio.
Our XM Satellite radio is now also mounted to the left side of the
entertainment center and plugs into the same speakers.
- Air Bed *old*
In '04 Dawn and I began
sleeping at the dinette. The first shock we had on deciding to
use this are was that even though it is a double berth it is the
perfect width of a TWIN (38") mattress. We bought a air bed
for this space as messing with the various cushions was a pain.
While narrow, this has turned out to be a great place to sleep.
We have mastered the art of synchronized rolling and enjoy the added
volume of space around us and the easier access.
*Update 05* We have stopped using
the air bed. It is just too small for two but would be a great
bed for a single person.
- Curtains *old*
We quickly at the last minute
added interior curtains for the windows. We used the bolts
holding the plexi in to mount the brackets for the rods, and we cut
up a cheap valance for the curtains. They still have many
rough edges but have served their purpose. We will be making
new better looking ones next winter.
- Instruments *old*
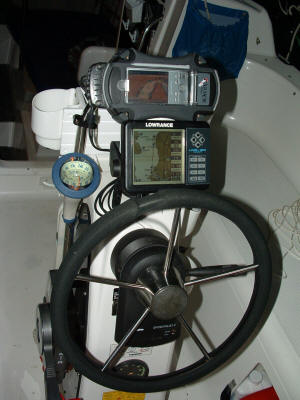
- Navigation Software *old*
This was my original configuration at the
Pedestal. I used Memory Map as my Pocket PC software which I
really liked, still do, but it doesn't directly support my new
autopilot yet so I needed to upload waypoints and routes to the GPS
and Memory Map couldn't directly do that either.
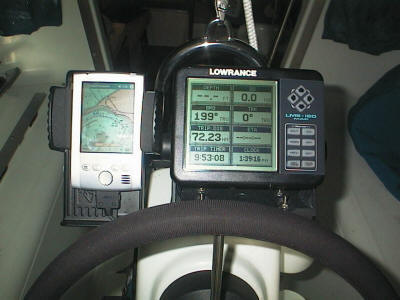
- Instrument Re-Config *new 04**old*
- Navigation Software *new
04**old*
This is my new pedestal configuration. I
have added a waterproof 'Otterbox' case for the pocket PC.
It's handle slips over an aluminum plate attached to the GPS base
which lets it all mount on a single RAM mount. It can rotate
and tilt to face any direction. The GPS, computer and
autopilot are all connected together for two way data exchange using NEMA 183 at 4,800 bps. I have switched to OziExplorer for my
Laptop and Pocket PC. It directly supports upload and download
of waypoints and routes to the GPS. The GPS sends the required
autopilot sentences for using NAV mode on the autopilot which is a
lot more accurate than having it steer using point and shoot mode.
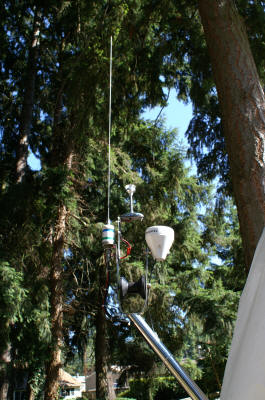
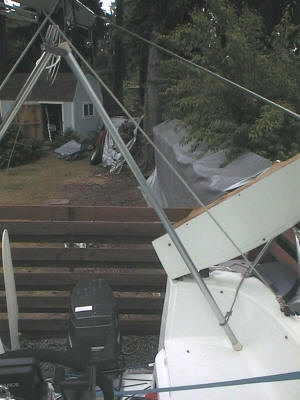
- Antennas On Mast Crutch
*old*
My older '96
boat has the offset trailering mast crutch mounted on the
transom. Since this is always along for the ride and is a
pain to remove I decided to put it to use. It can be
pivoted 180 degrees outboard and serves as a poor man's radio
arch. I mounted my VHF antenna there
- Steaming/Anchor light *new 06*
*old*
I added a LED all around light to the mast crutch /
antenna pole. This joins the VHF antenna and the GPS antenna.
We are using the boat under power without the mast quite a lot.
This leaves us without a forward facing white light at night.
This new LED light will fill that need. The enclosure actually
masks the stern light some so this all around light is what we need
under power. It's super low power draw also lets us use it as
a anchor light.
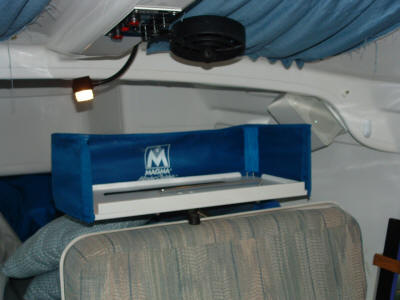
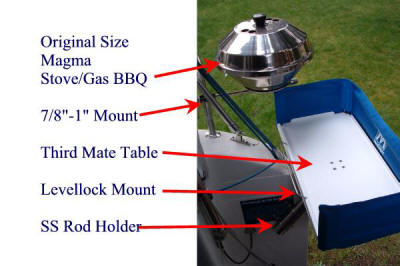
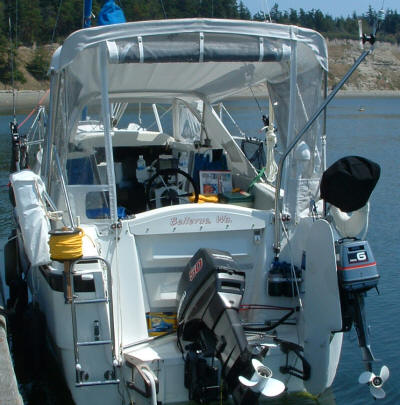
- BBQ Area
*new 03*
*old*
Our Magma first mate table
with a fishing rod holder base can be easily attached on the
transom right by the grill creating a great BBQ area.
- Lifesling / Life Ring *old*
On the starboard aft pulpit we have a
throwable
life ring and on the port aft pulpit we have a Lifesling II
- Extended Grab Bar
*old*
I originally installed just
a short grab bar loop at the pedestal. This worked fine,
but it was removed and sold when I got my table.
- Mast Carrier Support
*old*
The offset transom mast
carrier had a lot of flex. I added a section of 1" EMT
with rubber ends that supports the carrier and eliminates all
the bounce going down the highway.
I still want to add a mid mast support at the mast step.
Large Potty *old*
Probably the first mod we did was upgrade the head
from the wimpy 2.8 gallon model to the larger 5.2 gallon model.
While still never enough, we find this will hold us for 3 days or
cruising.
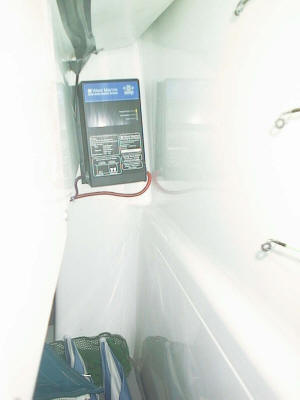
- Shore Charger
I put in a West Marine 5 amp shore charger. It
supports dual batteries but I only use one circuit.
- High Pressure Electric
Air Pump
*new 04*
*old*
To inflate the dinghy we
purchased a very nice Scoprega BST 12 HPP dual mode electric air
pump. It has a very fast high volume pump that will
inflate a dinghy chamber completely in about 30 seconds.
It also has a high pressure chamber that can provide up to
11psi. It is controlled by a auto pressure shutoff switch.
You just choose the pressure on the dial and it turns off when
full. Putting 3psi in the body tubes and 9 psi in the air
floor is now quick and easy.
Note, Pump died August 2007. Plastic
parts in the low pressure section melted and froze up burning out
the motor.
|


 |
|